Where plywood doublers are required under fittings I have been using temporary screws through the holes for the fittings to clamp the reinforcing to the underside of the deck. I have to be careful that the glue does not cure too much before taking out the temporary screws otherwise the screws will break. During the week I took gamble and left the screw extraction until the morning. I took to the task as soon as I woke and was lucky to get the screws out intact. I am not game to take the chance again and will wait up until the glue is just right tonight.
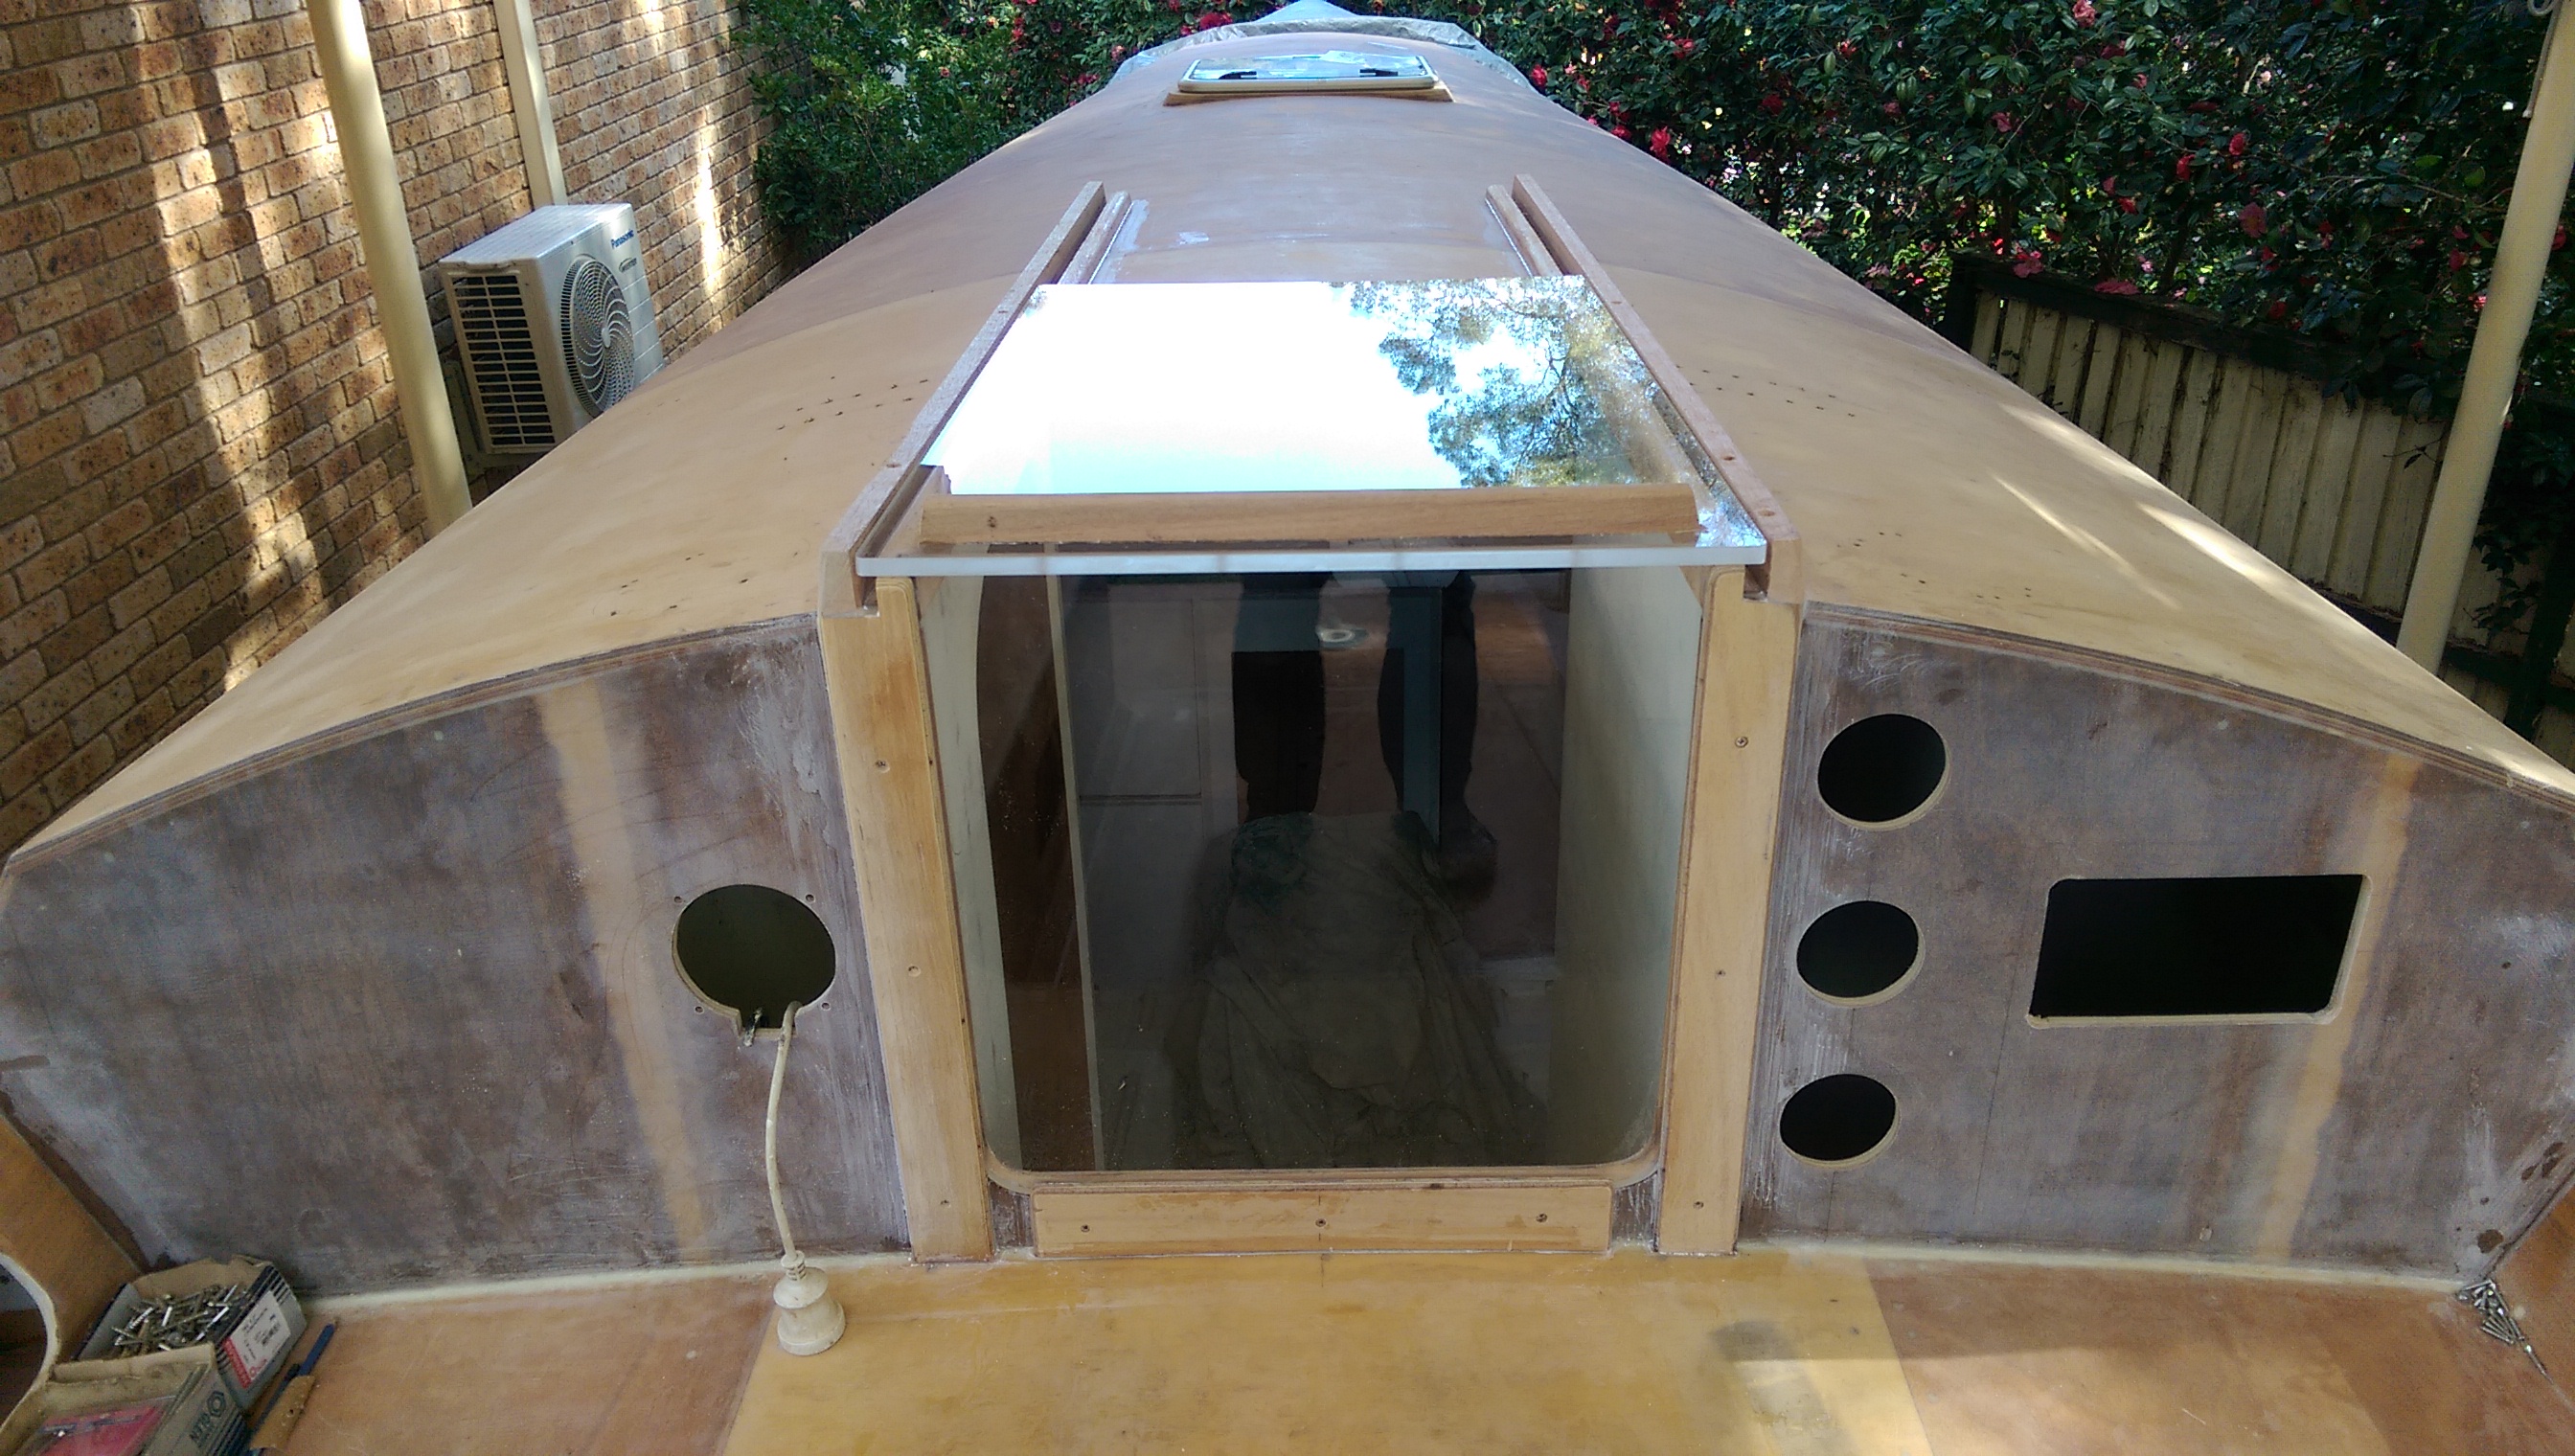
I still have about ten backing pieces to install including ones for fittings that I have yet to purchase. I need to get this job finished so that I can paint under the deck but it is a fiddly job and there is not much to show for the effort. The jobs that give most for the effort are attracting me so I have almost finished the companionway hatch. This seemed like a simple job but I wanted it to look classy so I have spent quite a bit of time getting the alignment just right and using spacers to keep everything parallel. I have put a taper on the runners and given the hatch garage side skirts for a bit of class. To ensure a good fit I used 1.6 mm veneer as spacers between skirt and runners and screwed the assembly to the runners while the glue cured. Plenty of kitchen paper made sure that the garage would not stick to the runners.
The skirts will be glassed to the garage roof inside and out to make it sturdy. I had thought of leaving the garage off as on my Jeanneau SO37 buy the garage is a neat way to keep the water out. What I have settled for is the same detail as on the Jeanneau SO37 but with the garage in front section. Behind the garage capping pieces keep the sliding lid in place and provide hand holds as on our SO37. These will be painted as I am tired of the continual varnishing required on the hatch trim on the production yacht.
Last Friday the crew helped with marking out fitting positions so we were able to drill all the holes for the Ronstan genoa tracks, the Spinlock rope jammers and deck organizers and the Harken winches on the cabin top. The fittings I still have to acquire are the cheek blocks for the genoa sheets and the jammers for the spinnaker kickers. That should leave just six pad eyes for the cabin top life lines, the spinnaker pole down and the baby stay.
The paperwork for the launch is progressing and during the week I obtained my MMSI number for Passion X so that the new VHF radio and AIS system are registered. I still need to get an EPIRB and have it registered before our first offshore venture but I am getting a bit ahead of myself.
Thursday should be another milestone if the new build passes Survey for insurance purposes. It might not be finished enough but it is a very good stage for an inspection before I cover all the structural detail with paint.

Looking out of the Didi 40 Cr through the clear perspex hatch and washboard

Looking at the companionway hatch and deck hatch from the front of the cabin
External view of the companionway hatch before making the hatch garage.

The hatch garage before trimming the excess plywood from the edges