Next Passion
To my surprise all the plastic protection was removed from the hull when I arrived at the Dock on Saturday morning. The colour will appear lighter when the yacht is out in the sunlight and it will be interesting to see what shade of grey it is when immersed. The first coat of two pack polyurethane non skid is already on the cockpit floor o when all the construction gear is cleared away we will see the final colour scheme.

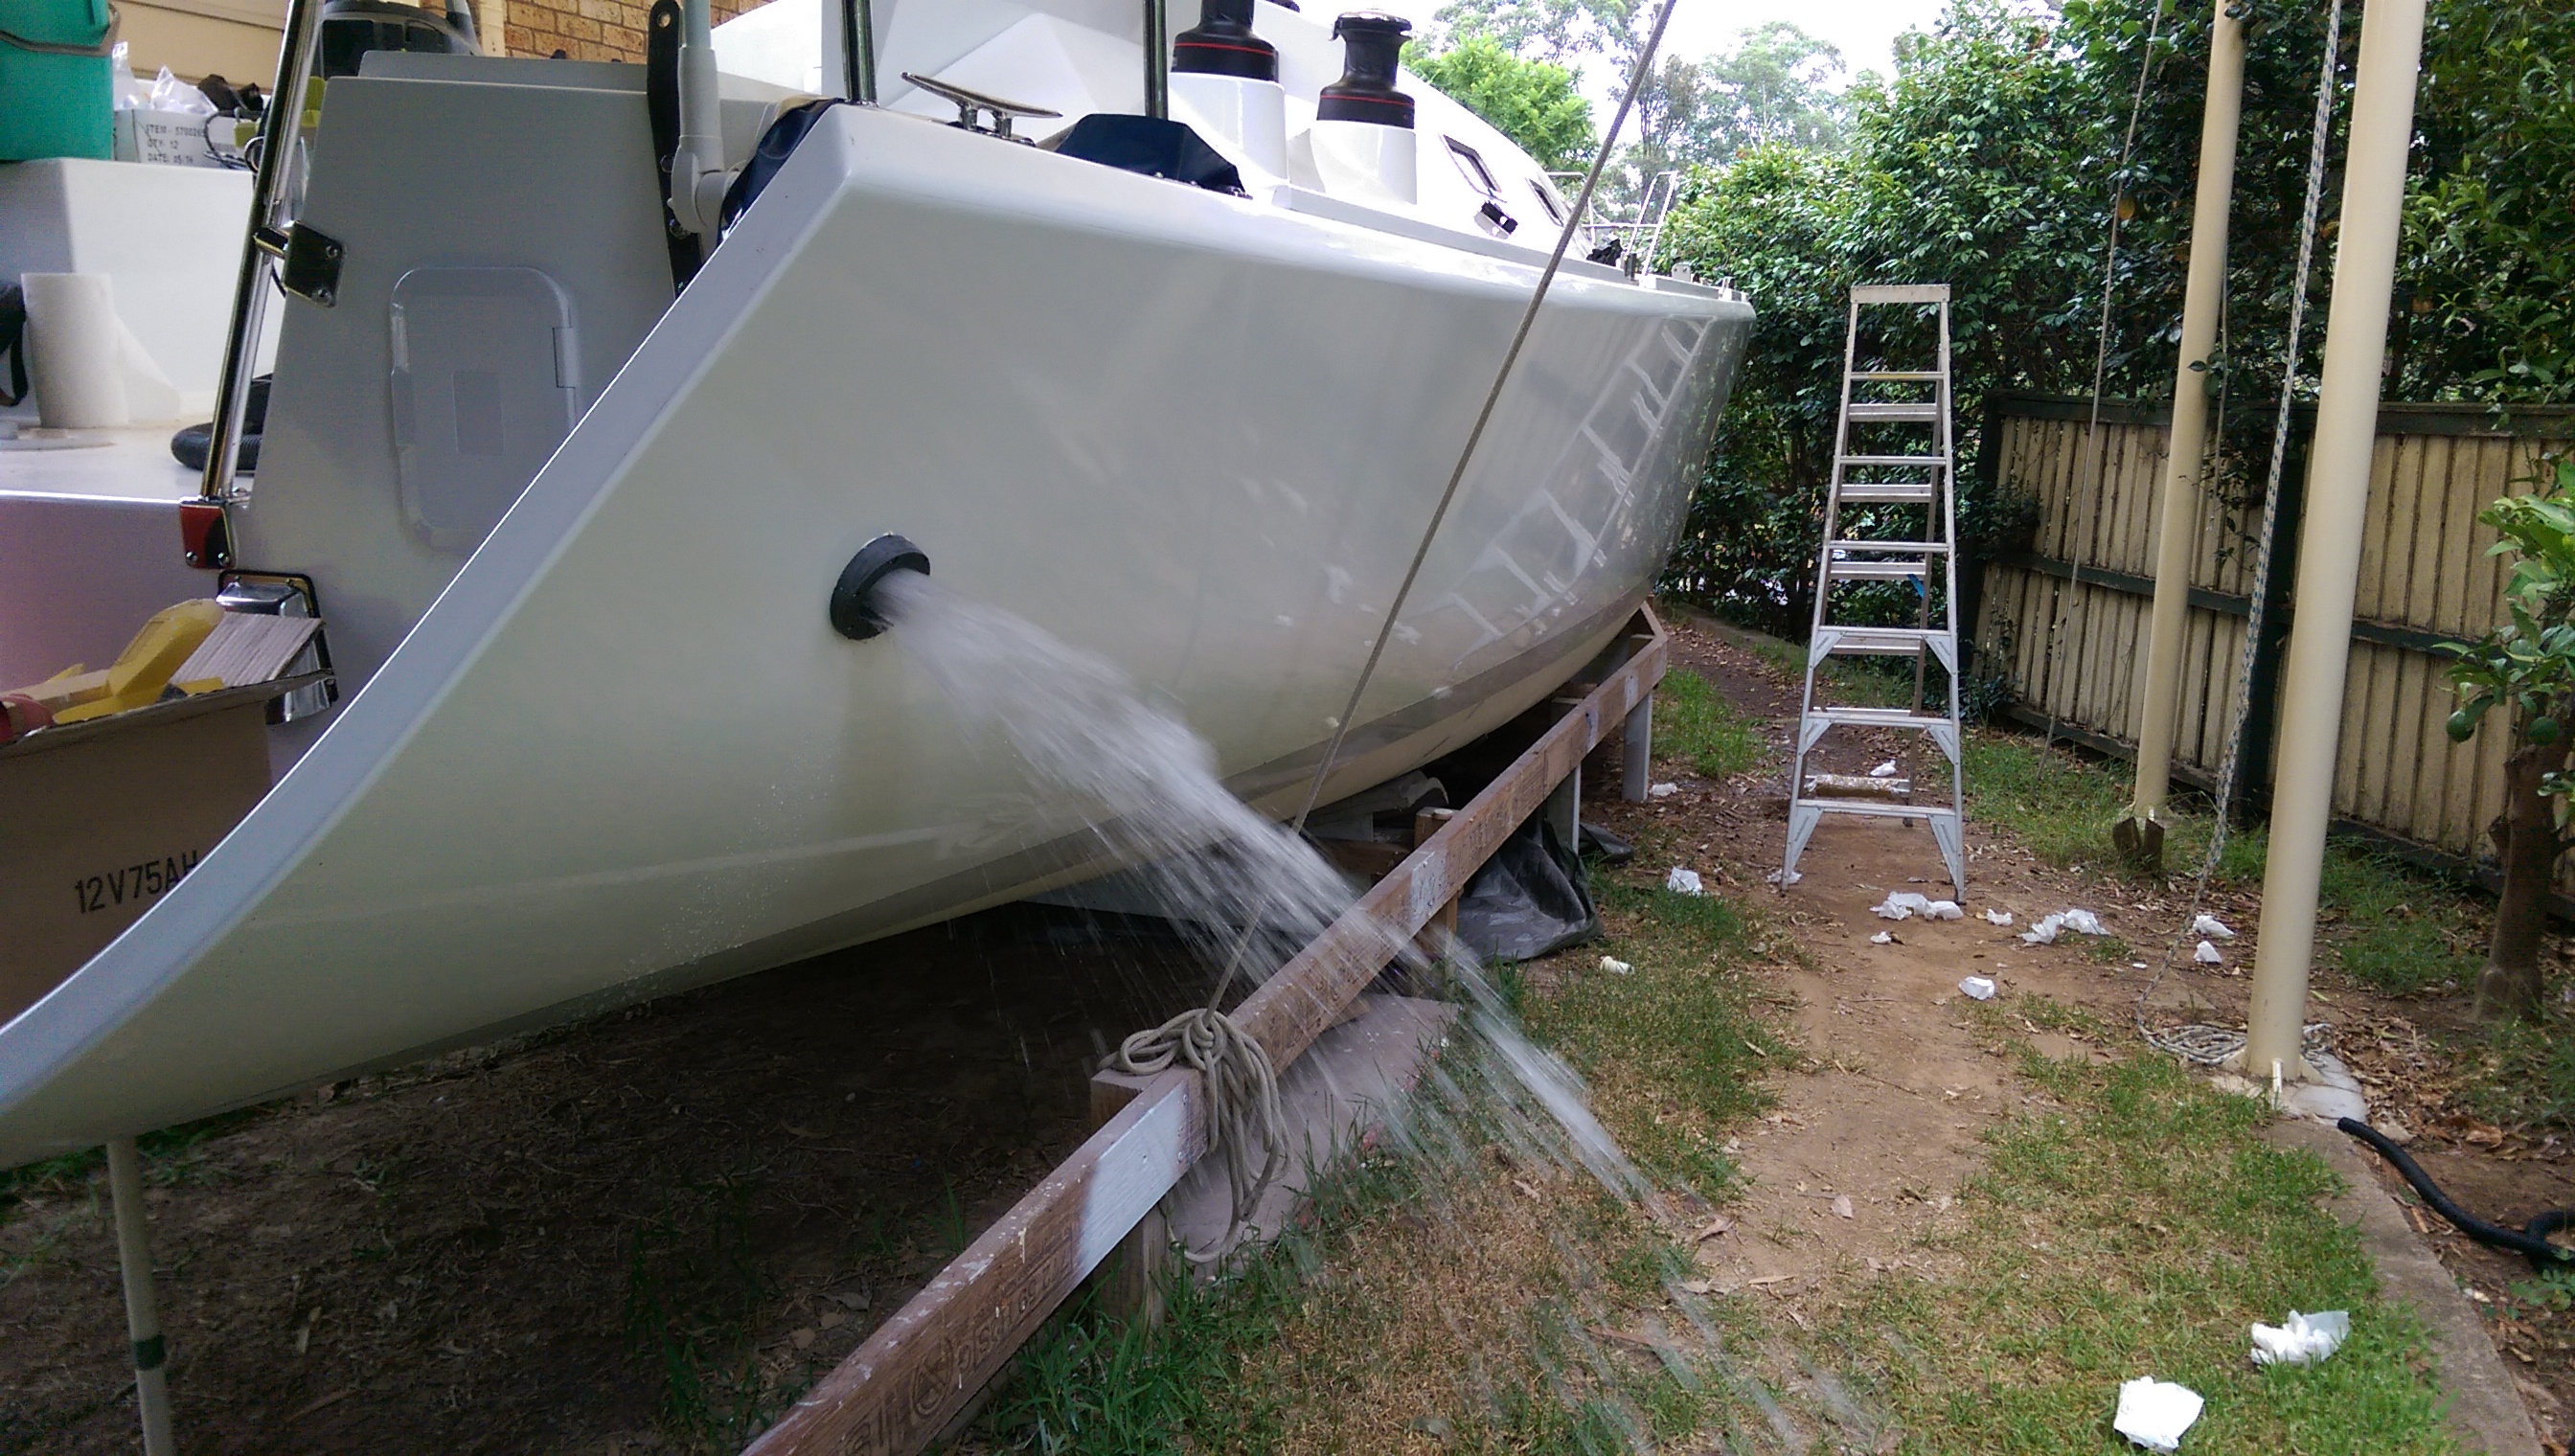
First look at the colour of the antifouling on our Didi 40 Cr

First coat of patinum grey non skid on the cockpit floor of our Didi 40 Cr
The colour scheme on our new Didi 40 Cr, passion X, is white with shades of grey. The boot top is light grey and we mixed up white and black antifouling to achieve a mid grey. I am waiting for the plastic masking the hull to come off to get a first look at the colour scheme and will post photos when I can.
Since the keel and rudder fit we have had the Hydralign three blade feathering prop fitted and the hull painted. We have been unable to get access to the hull for the past two days due to the masking and painting but tomorrow work can start again. At home I have finished shaping the tiller and applied the first coat of clear epoxy and I am getting gear ready to put on the boat at launch on Wednesday morning.

The three blade Hydralign feathering prop is fitted

The finished grey antifouling on our new Didi 40 Cr, Passion X.

Plastic shrouding around Passion X to stop the overspray going on Wild Oats XI
Passion X our new Didi 40 Cr left home this morning. We had to take the roof off the awning, lift the hull out and then replace the awning. It all went to plan on a morning that was perfect for the task.
Last week the keel travelled from the Central Coast to the Woolwich Dock and now the hull and keel are side by side. Quite separately the mast, boom and rigging travelled from Queensland to Woolwich and is just around the corner from the hull. There is still a lot of work to do to finish the interior to our satisfaction but in some aspects the yacht is more complete now than the much loved Jeanneau 37 that it will eventually replace. The instrumentation is at the standard that we developed on Passion over ten years and we have safety harness attachment points that we took several years to add to Passion. The fridge will be colder, the alternator is almost twice the size and the fuel tank and water tanks are larger. What we do not have is a lot of fancy teak trim and I still have to add a lot of painted trim around the galley which I will do over the next few years.
Our next steps are to fit the hull to the keel, step the mast and go sailing but I am getting ahead of myself.

The neighbours over for a celebratory drink on the eve of the move.

Joking about the “red light” district.

We have lift off

Don’t drop it now

The underside view of our new Didi 40 Cr

On the truck ready to go.

Going

Our Didi 40 Cr in the slings at the Woolwich Dock

Back to work making the tiller. Might need it this week.
A crew busy bee yesterday saw all the winches and turning blocks fitted as well as the last five portlights. While the crew was doing that I was busy installing hose for the engine cooling system and the fuel supply. We had a deadline of 8 am today for the boat electrician to return and start the motor so there was no time to lose. More holes of the fuel line and plumbing routs had to be drilled and wet on wet coated with epoxy paint to seal the end grain of the plywood. The touch up painting was completed after 10 pm last night and I was up at 6 am today to pass all the hoses through the holes and connect the fuel lines. By 7:30 I was on the way to buy 20 litres of diesel. The Yamnar diesel started first time but we needed some advice on bleeding air out of the hot water system. I had all the gear needed to suck coolant through the hot water system and connect it to the motor so by lunchtime the engine was running sweetly.
Cooling water coming from the engine exhaust via the water lock muffler.
The prototype of the yacht I am building just completed the Cape to Rio yacht race for I think the third time. The provisional results shows Black Cat finished seventh on IRC out or a field of 20. They sailed on a TCF or 1.05 which I think they achieved with a reduced size genoa. Our TCF would be higher due to the deeper keel and extra sail area so it will be interesting to see if we can sail at that level.
A lot has happened over the past two weeks. A couple more days of electrical work and all the 12 volt system is completed including instruments, autopilot chartplotters, fridge and pumps. The lighting has the option for red night lights and I like the look. Wednesday the gas was fitted by the approved Gas Fitter. Yesterday was Australia Day and I celebrated with more top coat inside the yacht and the first fibreglass on the rudder. Today we had the electrician working and two of the crew helping to screw on fittings so we fixed all the toe rails, the last of the jammers and half of the winches. As a bonus we connected the refrigerant lines on the ice box and tonight I am testing if it will freeze water on the lowers setting. So at last I have some photos to show.
As we have moved fittings from the rumpus room to the yacht Elaine is getting some of her house back. At the same time the interior of the yacht is getting more comfortable so we had tea inside the hull while we enjoyed the music from the stereo and admired the night lights.

Our Didi 40 Cr showing off stainless steel, running lights and toe rails

The view from the stern just catches the stern light

Navigation station with red night light option on.

All the lights we can see from the companionway have the red night light option

The bulkhead instruments at mid brightness level

Even the cockpit locker had the red night light option
We have a very standard Raymarine system on the new yacht. We have wind, tridata for boat speed depth and water temperature, a liner autopilot and chartplotters at the navigation station and on the deck. It is a copy of the system on Passion but using the latest hardware. I reported my purchase of the last chartplotter and autopilot system in the last post and they went straight onto the onto the yacht. When we powered up the Seatalkng network I was surprised and annoyed that we had a constant “No Pilot” alarm that was preventing any diagnosis of the system. The issue was resolved by downloading the latest version of software for the EV1 course computer and it fixed the issue immediately. I am not pleased that the equipment shipped in the one box was not software compatible but at least it gave me some practice at the software updating and all the equipment is now on the very latest versions of everything. Also the discussion with the Raymarine technical person provided some good advice on system redundancy like putting the Seatalkng into both chartplotters so that if the master fails the slave takes over with all the data already connected. Another good idea is to have a dedicated Seatalkng power supply prewired behind the panel so that if the autopilot fails we can plug the power supply into the backbone and still have the Seatalkng network running. I could power the backbone separately but I have run out of available connections and in ten years have never had a fault with the autopilot system powering the seatalk network on Passion.

Software version 1.11 on the EV1 course computer instead of the required 2.17
With the instruments working I turned on the VHF and realized I needed the MMSI number so went on line to apply for one only to find that I had already done the exercise and already registered the VHF and AIS. I shot off an email to AMSA apologizing for being forgetful and promptly entered the data into the VHF and it worked even without the antenna installed. The radio is working fine too and so are a few lights.
The next target for electrical completion is the fridge. The condenser is mounted in the ice box and the compressor is sitting on the base ready to be joined so by Friday night I hope to have a cold beer in the fridge.
The other domestic appliance that needs to be installed is the oven and the gas fitter is due this week.

The new white bulkheads brighten up the hull. While it has taken more time I am pleased it is done.

The battery box, isolation switches, charge control relay and battery charger.

The instrument panel with 12 volt panel, chartplotter, VHF and AM/FM radio. On the right is the tank level. 12 volt outlet and 240 volt panel.
It has been over three weeks since my last progress report on the building or our Didi 40 Cr due to a break from building when we drove to Adelaide for the Laser Nationals. Prior to the break I was busy painting all the galley components and working on the ice box. Since we returned home on Friday 6th it has been a frantic effort to keep the painting ahead of the electrical installation.
I have been drilling lots of cable holes and openings for instruments and mounting them ahead of my boat electrician schedule. From Monday to Friday he completed a substantial amount of the wiring and we now have the engine battery and three house batteries installed and on charge from the shore power battery charger. The 12 volt panel is wired up and power has been supplied to the two chart plotters and to the autopilot. We are waiting for some Seatalkng connectors to connect the power to the backbone and light up the water speed, wind speed and autopilot control instruments. We are also waiting on a long networking cable to send data between the two chart plotters and a cable to convert Sealtalkng to NMEA 2000 to interface with the AIS.
Most of the light fittings have been mounted but removed so I can finish the top coat.
The other change has been the painting of the bulkheads white instead of the planned clear finish. I was planning on just a couple of coats of varnish over the epoxy on the bulkheads to save time but the first coat of varnish showed up too many imperfections in the timber so I have gone for an extra two coats of undercoat and a top coat or two. The warm weather has helped the paint drying process but it is best to leave each coat for two days for ideal sanding conditions. This week I plan to install the plumbing and fit in the last of the major painting in between. I also have to mount a number of 12 mm ply panels for securing electrical equipment to the hull as we cannot drill into the single 12 mm skin. There is also a 24 mm thick panel required to bring the skin up to 36 mm for the base of the autopilot actuator. I will get a stainless steel backing plate for this as the bolts will go through the transom and will need to be decorative as well as functional.
Our stainless steel pulpit and pushpits have been trial mounted and I am just waiting for help to finish the fixing to the hull. I did a shop on the super hot Wednesday last week for the autopilot and second chart plotter and on Saturday another shop for more paint and all the nuts and bolts for fixing the rest of the fittings.
I am currently working away on the ice box or refrigerator on our Didi 40 Cr and the one thing keeping me going is thinking of a cold beer after a days sailing. There is many ways to make an ice box and I have chosen to use a low density foam on the outside 50 mm and higher density foam on the inside 20 mm so that the fibreglass will not have to be too thick. The two layers of foam are installed in the box waiting for the fibreglass to go over the top and the top and end of the box are made and detailed ready for the foam to be fitted to them in the morning. I have to remember to insert some plywood into the foam to hold the condenser as the light skin of fibreglass alone will not be strong enough.
There are lots of little jobs going on in parallel and I have a very specific list of jobs written out before the day starts. I think I am down to just four bits of plywood to fit inside plus the holding tank to make but as I type this I realize that I need rod holders for the three hanging lockers. Also the locker lid for the battery box has not worked out as expected as the hinges pull apart the wrong way. I need to remove the lid to be able to remove the end engine inspection hatch so I have a bit of thinking to do on this one before I will be content.
The car is full of engine compartment sound insulation and I want to install this directly onto the panels without putting them into temporary storage so that is another priority.
One long outstanding job has been completed to my satisfaction. When I glued up the panels that form the head the 45 degree join was a couple of millimeters out of straight. Now I can see a couple of millimeters so I neatly cut out the glue from the join and reglued it with thickened epoxy and this time used a massive straight edge to hold it all in line. The door trim also fits into this 45 degree join and overlaps the first join. It is now in place also held straight with a straight edge until the glue cured. The 9 mm plywood door trim stiffens the door opening significantly so it is looking good.

First layer of foam in the ice box.

Galley furniture in our Didi 40 Cr taking shape with sink and ice box openings cut.
I have been pushing ahead with the engine compartment and galley so that I can get the floor levels and edge support in these areas established. So the engine compartment is temporarily installed with screws so that I can remove it from the hull for painting and fitting of the insulation. While it is out I will fit the foam to the fridge so there is a bit of work piling up. With the engine compartment in place I fitted the companionway floor supports and fitted the first floor panel. It was a good fit but the surface was a bit too slippery and the feet of the ladder slipped before I had a chance to install some cleats. The result was a nasty fall down the companionway with my body inside and my arm outside so I have a couple of bruised ribs and a forced rest. There were lots of cleats in the engine compartment and galley to be glued and that was a good light task for my condition. I even managed to install the sliding doors behind the stove and fridge. While doing these jobs I thank my father Ted for his example of wood work and all the skills I picked up from watching him. Still in search of light duties I mapped out the drawers for the galley and settled on three narrow drawers and one deep one. I cut the surrounds and rails on the circular saw bench and did a trial fit with a couple of 9 mm ply panels that will be the 18 mm thick drawer fronts. I was so pleased with my first floor panel in the companionway that I put up with a bit of pain to cut out the panel that runs down the side of the engine compartment to the settee area. It is trimmed and fitted now and provides a nice unobstructed route through the hull. That was the last of the 12 mm plywood so I will have to order another two sheets to finish the balance of the floors. I must paint the battery compartment as a matter of priority so that I can install the first couple of batteries and get the electrics under way. I will remake the instrument panel as the 6 mm ply I used was too floppy and distorted. I have some very nice seven ply 9 mm sheets that will do the job well.

Sliding doors behind the stove and ice box are completed but for painting.

The one piece removable end for the engine compartment fits nicely and the floor from the companionway to the sitting area is now in place

“U” shaped dining area structure in our Didi 40 Cr is now completed

Floor in the dining area and false floors inside the seats are fitted.

Galley panels for our Didi 40 Cr are cut and waiting for cleats to be fitted.

The hardwood rails for the galley sliding doors will go in this space behind the fridge and stove. I broke one router bit on the first few centimetres so reverted to the circular saw to cut the grooves.
After several weeks where tedious fibreglassing took up most of the time I am now building in furniture from plywood sheets. The first structure was the extra seats that form the “U” shaped sitting area. The front seat is for general storage while the back seat will house the battery bank. The structures are built, the false floors added and the lids cut. They still need to be painted and the lids hinged but the upholsterer can now measure up the last two seat cushions. With the seats in place I was able to cut the temporary plywood floor into the final shapes and add edged supports where needed.
The settee area with the new seats provided a very good working platform to start on the engine compartment and galley furniture. It is quite a tight fit with just 475 mm between the quarter berth ante room wall and the galley top and the engine enclosure cannot be any smaller. I had to cut a hole in one side of the engine enclosure to give some clearance to the bigger alternator on the new Yanmar YM30. The hole is inside a cupboard so it will not seen but it showed how tight a fit it is. I also cut holes on both sides where the nuts on the engine mounts interfere with the side panels.
Tonight all the plywood panels for the top and sides or the galley furniture are complete. I still have to cut the end panels of the engine enclosure and will make them a stitch and glue item I will edge glue the sloping and angled pieces and once cured remove it from the boat and glass the corners on the shop floor.
I have to work out the detailing of the drawers in the galley and will probably do two drawers in the top half and one big deep pots and pan drawer in the bottom half.
There is lots to do including fitting the foam into the refrigerator and making a good insulated lid for that and also fitting the sinks into the galley top. With the galley structure in place I can now start thinking about the floor support cleats.

The finished king plank on the keel of our Didi 40 Cr. It is 100 mm wider and 3 mm thicker than the original design and the extra 100 mm with is made from hardwood to spread the keel bolt loads.
I have passed another milestone with the completion of the glassing of the keel floors to the hull. Once that was completed and I cleared all the limber holes I slapped on a coat of epoxy.
While the epoxy was curing I started cutting plywood for the engine compartment and by the time I had the two sides cut the epoxy was cured.
The yacht has been so warm that I have mixed only small batches of epoxy as the pot life is very short in the hot weather. I will paint on a couple of coats of epoxy paint before we launch but I can now get on with building the seats at the ends of the settee that will go over the king plank.
The king plank has been augmented with extra hardwood down both sides to share the pressure from the keel bolts. Dudley’s detail show small packers under the keel bolt washers but I have extended these for the full length of the king plank.
The king plank sits on top of the keel and forms the top of an “I” beam. The keel and plywood skin are the bottom of the beam. The longitudinal beam spreads the forces from the keel bolts among all the floors and in particular spread the loads if the keel touches bottom at speed. The standard design has a 15 mm thick king plank and with our deep keel Dudley increased it to 18 mm thick. With the extra width of timber along the full length of the king plank we have gone from 150 mm by 15 mm to 250 mm by 18 mm and the additional 100 mm is hardwood so the beam is much stronger than the original. The shear stress in bending of the beam is taken by the six massive keel floors which at that point are 110 mm wide and 80 mm deep.
There is no external progress to show but inside the boat a lot of time has gone into fibreglassing the water tanks and glassing the keel floors to the plywood hull.
The tanks are lined with 6 oz epoxy saturated glass which has been sanded to remove loose ends, epoxy coated again and primed. The last stage will be to paint on the potable water tank liner. The settee front that form one side of the tanks have been grouted to the hull and glassed in with two layers of 6 oz glass on the inside of the tanks. On the external side they have been grouted to the hull and glassed in with two layer of 12 oz cloth. The 9 mm ply of the settee fronts running fore and aft lock into all the keel frames forming a very strong structure but the connection around each of the six keel floors has to be water tight so it requires some care. To be honest if it was just a cruising yacht I would have put the water tank under the V berth where there is a massive space. That is where it is in my Jeanneau 37 and the upside is that the space under the settee can be used for storage. Because we are keen on speed we are keeping the water tanks central where the weight will be more useful.
The keel floors have now been all glassed to the plywood hull with four layers of 12 oz cloth which is over 2 mm thick. Personally I think this is unnecessary since the floors are connected to the ply hull with solid meranti timber which is 80 mm wide. If the frames were glass over foam like we added to our Jeanneau SO37,Passion, then glassing to the hull is essential both for transmitting the shear forces in bending and for adding skin side strength. In the case of our Didi 40 Cr we have gone for a deep keel and the extra loads are fully adjusted for by widening the laminated timber floors from 70 mm to 80 mm. I have added 2 mm of glass to the frames to increase the factor of safety. This I did on the shop floor before installing the floors in the hull 18 months ago. The intention was to add 2 mm of glass to the external hull again as an increase in the factors of safety. Between the designer and me we have double up on the glass. He wanted 2 mm of glass over the keel floors on the inside as well as all the glass included in the extra factors of safety calculation. I thought that was overkill based on my calculations but needed to build according to the drawings. I tried to negotiate to put the extra 2 mm of glass on the external side of the hull where it is more effective and laid up a full 4 mm of glass across the hull centre line in the area of the keel floors. The designer would not agree so we have also the 2 mm tabbing the frames into place. I guess is that the factor of safety is now over 5 compared to a design requirement of around 3 and it has been only an extra 20 man days to do all the reinforcing. That time includes glassing the individual floor with 2 mm of glass, applying eight layers to the hull in the keel area while it was upside down and glassing in the floors from the inside on my hands and knees.

Most of the glassing is completed including the front floor which is now tabbed to the ply skin with 2 mm of glass.
Painting the underside of the deck and cabin top has taken so long that I thought it would never be finished. It is not finished but all the lockers and painted inside and all the cabin ceiling side and under the decks is completed so we can screw on all the deck fittings. We had a busy bee today with the crew and screwed on a lot of fittings including the genoa tracks, cleats, mast base and halyard turning blocks, deck organisers and more stanchion bases. The quarter berth painting and V berth painting is completed and I have moved on to completing the glassing of the keel frames to the floor and the last of the epoxy glass lining in the water tanks. This does need a lot of preparation in sanding the gloss of previous coats of epoxy and removing all the dags and runs that would stop the new glass lying flat against the old surface. Another day should see the end of the preparation and some progress on the epoxy glassing. This job is on the critical path as I need to complete the floor before finishing the settee seats. One of the settee seats will hold the four batteries and I want those in place before I start the electrical work.

Deck fittings at last moving from the sun room to the yacht.

A good view of the mast base and Ronstan turning blocks

12, 8 mm bolts holding the chainplate in place. The bolts are cut to length so that most of the bearing on the frame is on solid shank and not on thread. The deck is sealed with Sikaflex and all the holes primed with epoxy.

Dome nuts on the chainplate backing plates for neatness.

Stanchion bases sit on epoxy glass wedges cut from the laminate I showed in the last post. The bolts go through 24 mm of plywood.
Milestones of sorts with all the underside of the deck and cabin top painted and the start of installing the fittings on the deck. All the chainplates that hold up the mast are installed and most of the stanchion bases. The final coat of paint has been applied inside all the main lockers and undercoat applied in the quarter berth. Five of the six coats of paint are on the toe rails so while there is not much progress to see there has been progress nevertheless.

A familiar angle on our Didi 40 Cr but with the masking off the boot top

The next time we see the keel of our Didi 40 Cr it should be at the dock

Lots of toe rail cut and drilled ready for more coats of paint.

Epoxy glass wedges ready to be cut and drilled for stanchion packers and a plywood spacer for under the mast step

Elaine has surrendered her carport for the day while I epoxy coat more lids and locker bases. One of the bases is for the hot water system and I have to bolt the water tank to the base and then install them together. I think the same will be done on the fridge compressor base.
Progress seems painstakingly slow as there are no dramatic photos to show for the week’s effort. The daily trips to Somersby to fair the keel took up much of the day and painting under the deck the balance of the time.
By Friday afternoon the second side of the keel had three layers of filler sanded and faired and two coats of International Interprotect. On the underside of the keel there is now four layers of Interprotect and the first coat of antifouling so we can stand the keel on the base when we take it to the dock.
Now that the underside or the deck is painted I am pushing on with the bite and pieces needed to fit all the fittings to the deck and cabin top.
I have laminated up some epoxy glass wedged to go under the stanchion bases, sanded and pre drilled the toe rails and started making the packer for under the mast step. The epoxy glass wedges are three mm on the thin side and 9 on the thick side and will protect the deck from stanchion sticking through the hollow base.
I thought I had made good progress with the packer for under the mast but decided to add a second layer of plywood so that it does not taper to nothing at the rear edge. The extra layer has been cut and the glue will be cured by the morning ready to recommence shaping the taper.
Today I cut to length, sanded and pre drilled all the toe rails. The holes are at 200 mm spacing to make sure we get a nice bend around the gunwale. I had previously epoxy coated the timber and now they have a coat of pigmented primer. I suspect another two coats of primer will be needed as a minimum because on the plywood panels I am painting at the same time I can still see wood grain after two thick coats. I think it matter not whose brand you are using and the International recommendation of four coats of epoxy primer on the timber seems to be what is needed for areas subject to regular water contact. Yes the toilet pedestal is getting four coats of primer and then undercoat and top coat.
I do get some pleasure from looking at the top sides and when the wind blew the tarpaulin off the front of the boat during the week I thought it looked pretty smart so I took a photo for the blog.